Tips to Free Up Mac Storage
How I tripled the available storage on my Mac by deleting useless files.
tl;dr – If you have XCode installed, then you could easily be wasting up to 10% of your disk space.
My MacBook Pro, which has 500 GB of storage and runs Catalina (MacOS 10.15), recently ran out of memory.

I needed free space, but didn’t want to delete any documents, photos, videos, applications, music, or other files that could be useful in the future.
Thus, my goal was to free up as much memory as possible by deleting irrelevant files – e.g., system files, caches, archives, logs, and other hidden files.
If you’re facing a similar problem, here are the 6 steps I took to free up roughly 50 GB of space.
1. Assess the Situation
First, we need to find out how our computer’s memory is being used.
-
Go to the Apple logo in the top left of your screen, and click
About this Mac.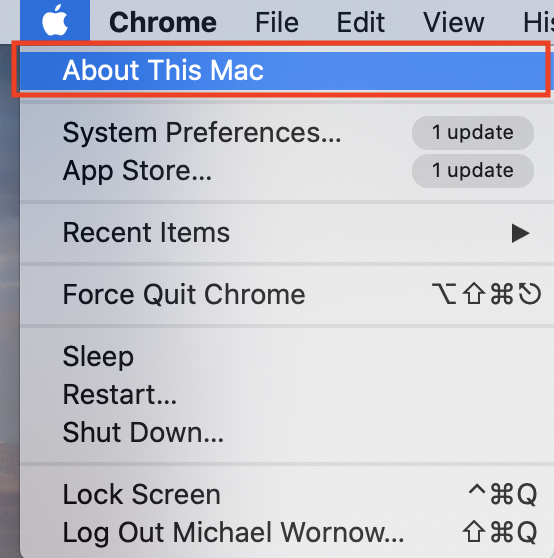
-
Click on the
Storagetab.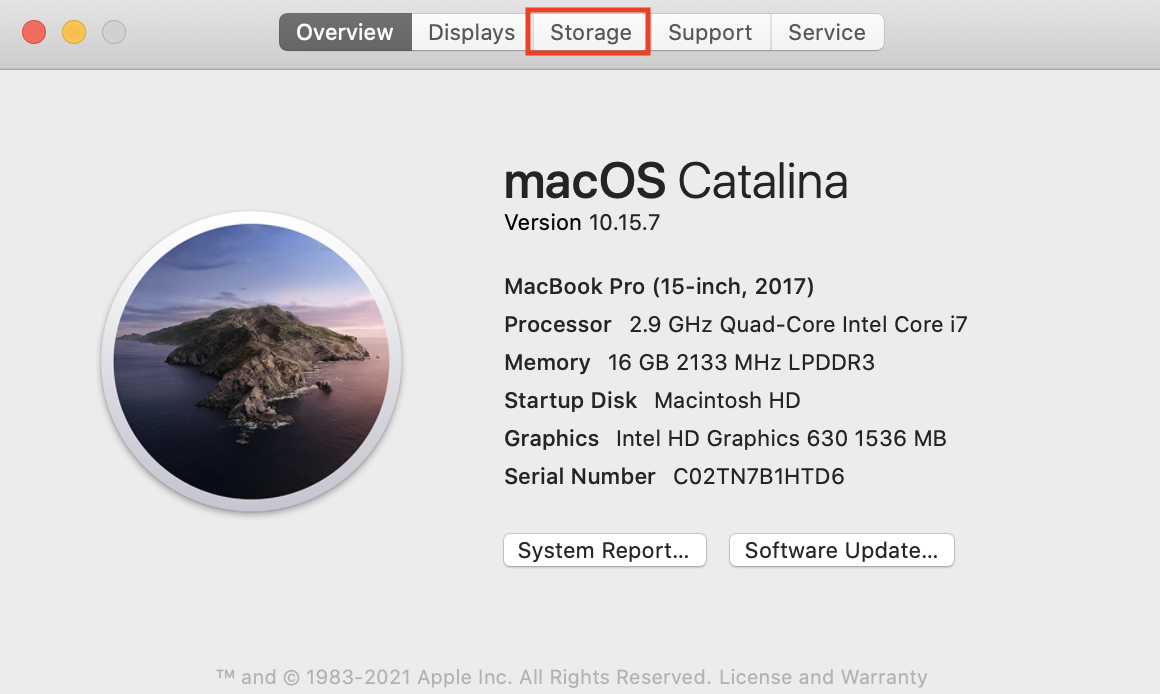
-
Click
Manageto get a detailed overview of your storage allocation.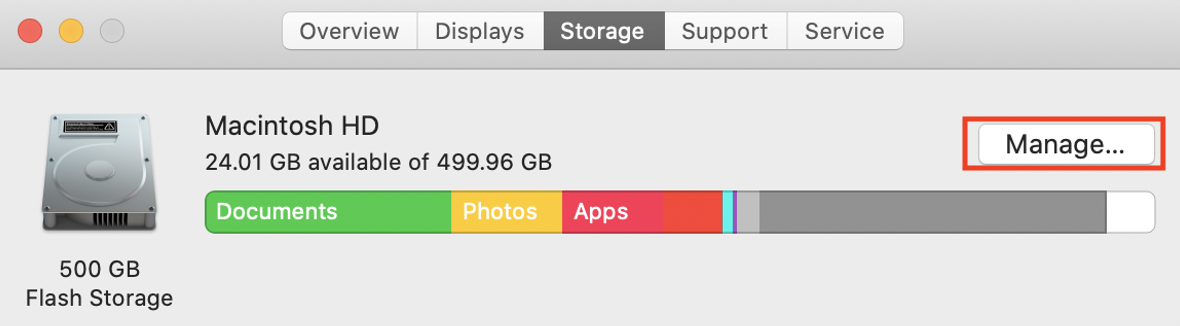
-
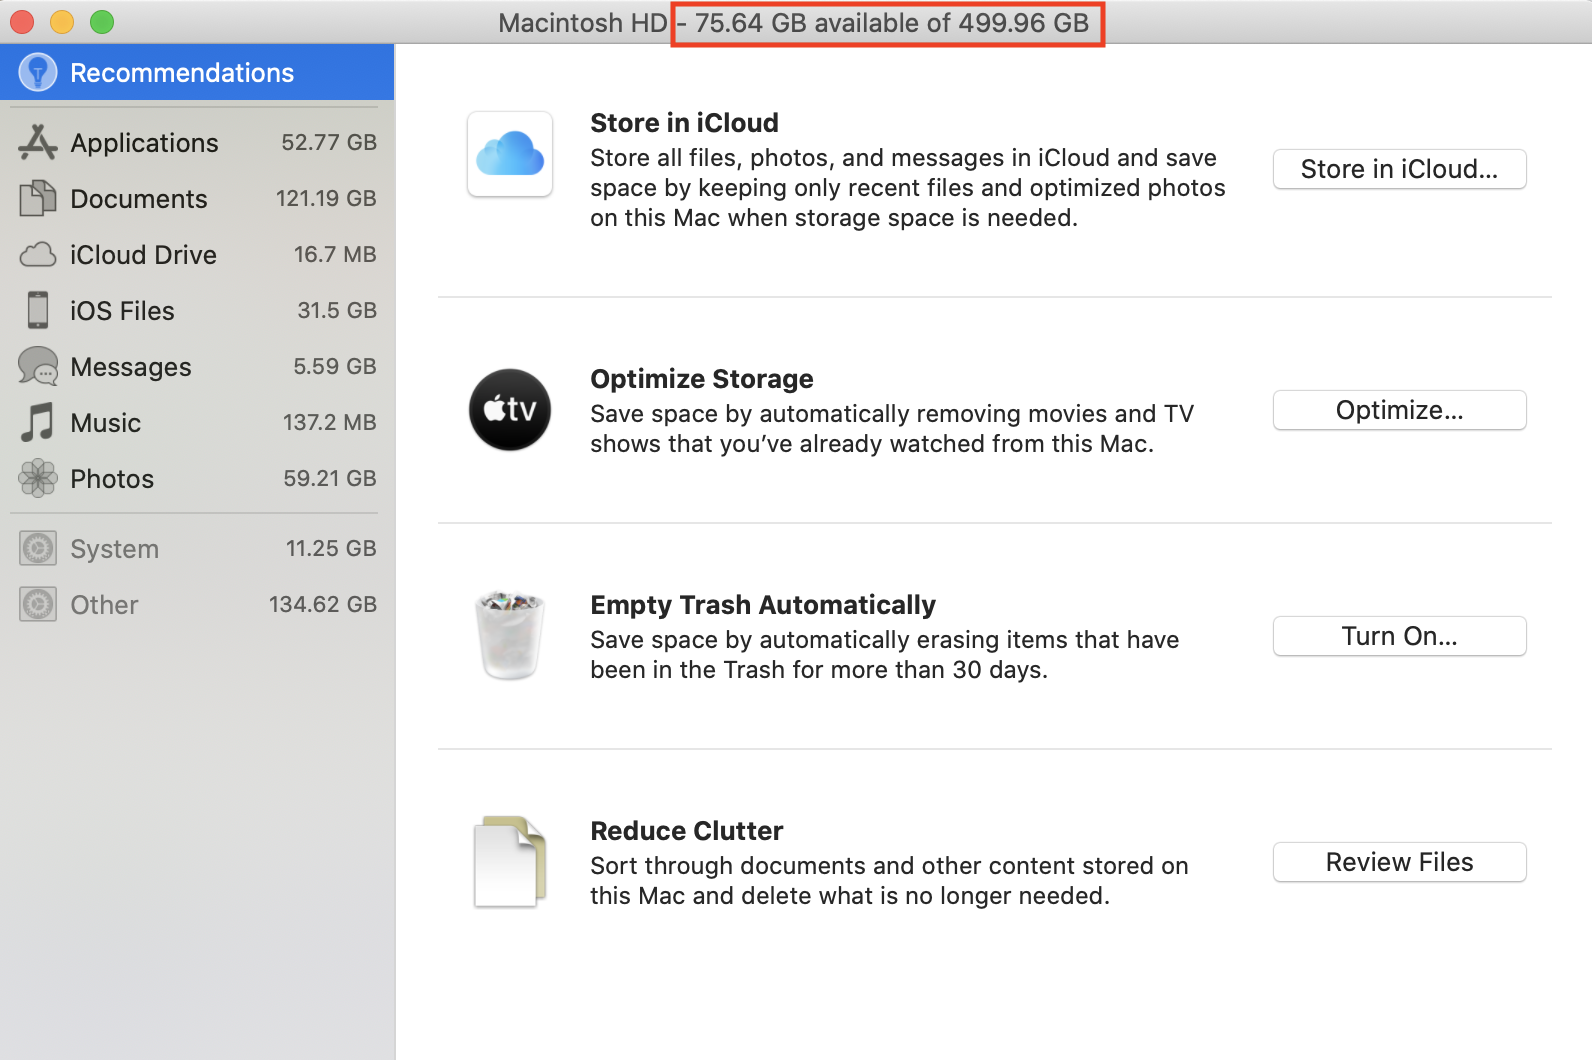
You’ll now get to the following panel, which breaks your storage down into 10 categories and shows how much memory each category is using.
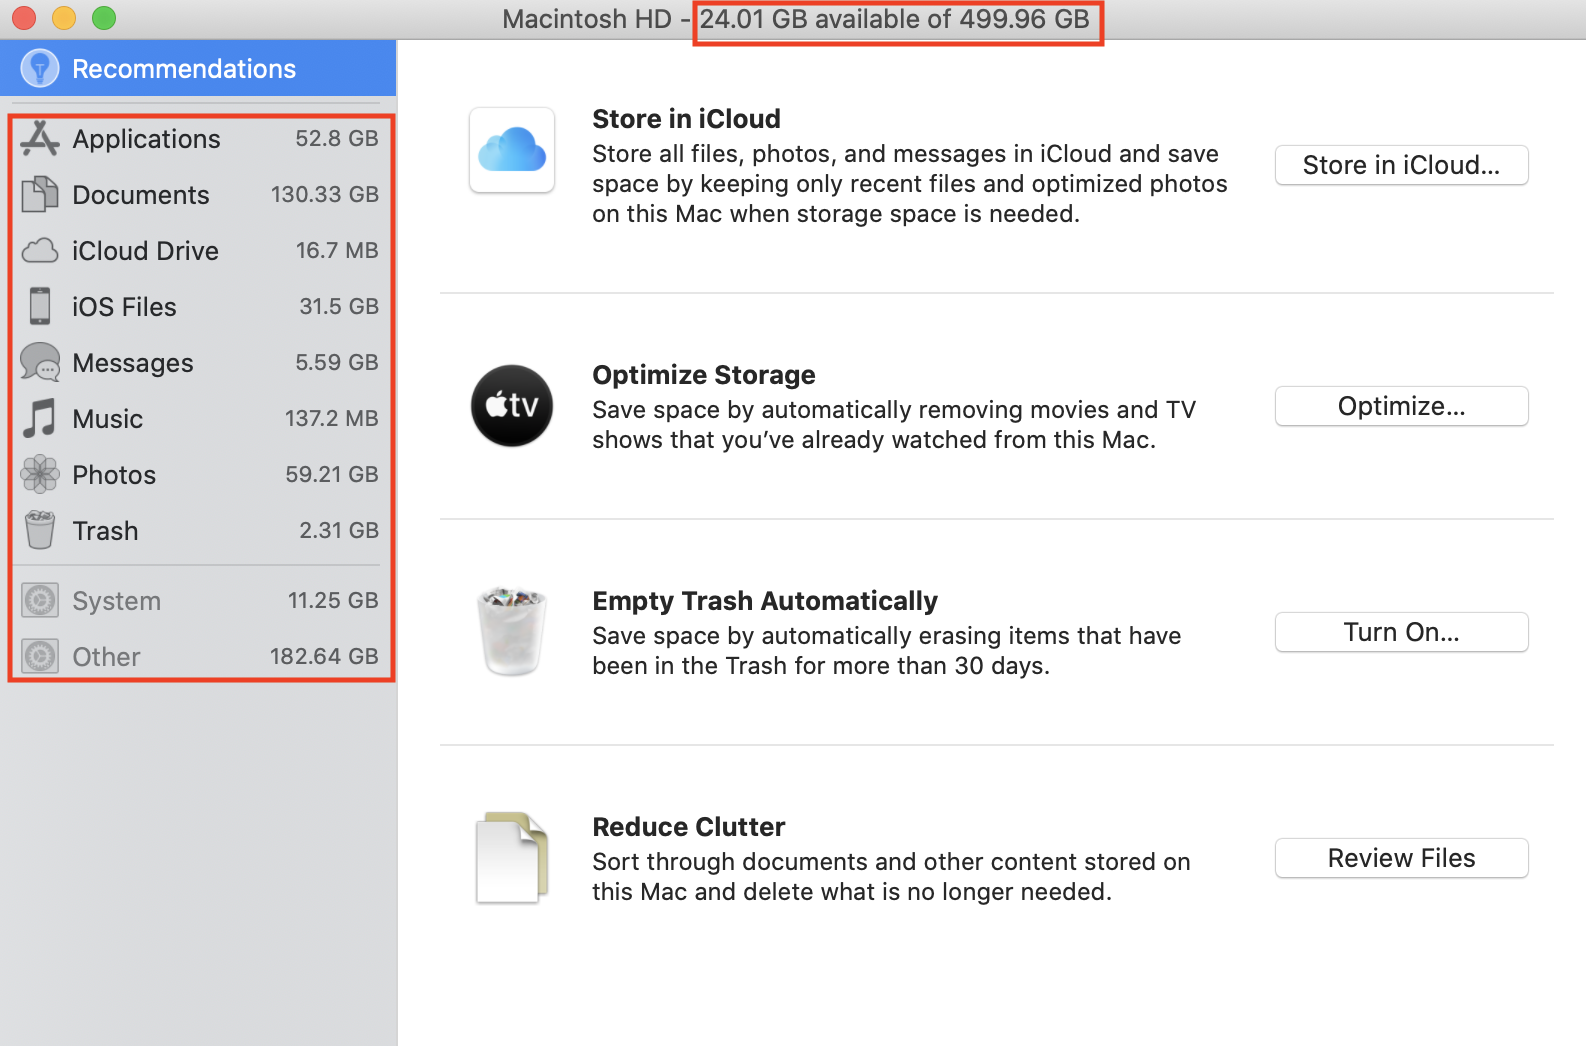
This is super helpful in getting an overview of how your memory is being eaten up.
The categories that we can play with are:
- Applications
- Documents
- iCloud Drive
- iOS Files
- Messages
- Music
- Photos
- Trash
- System
- Other
Freeing up storage is just a matter of going down this list.
Since I wanted my storage back for “free,” I decided to focus on the mysterious, greyed out category called Other.
And what is Other?
After a bit of Googling, I found out that it’s essentially everything in ~/Library/.
2. Empty the Trash
But first, the lowest hanging fruit.
We should fully remove files we’ve already deleted that still take up space in Trash.
To empty the trash, click on the Trash tab and then the Empty Trash button.
![]()
Savings: 2.3 GB
3. Clear Out XCode
Now let’s get to the Other category.
After some more Googling, I learned that if you have XCode installed, then you probably have a ton of wasted memory in the form of caches, application support files, and build indexes.
We can delete many of these files to free up significant space with essentially no negative impact.
3a. Archives
The ~/Library/Developer/Xcode/Archives/ folder contains all of the archives that Xcode creates while preparing apps for submission to the App Store.
I deleted all but the most recent builds from this folder.
NOTE: You might need to access some of these files in the future if you want to debug past builds. Thus, only delete files corresponding to builds that you won’t need to later debug.
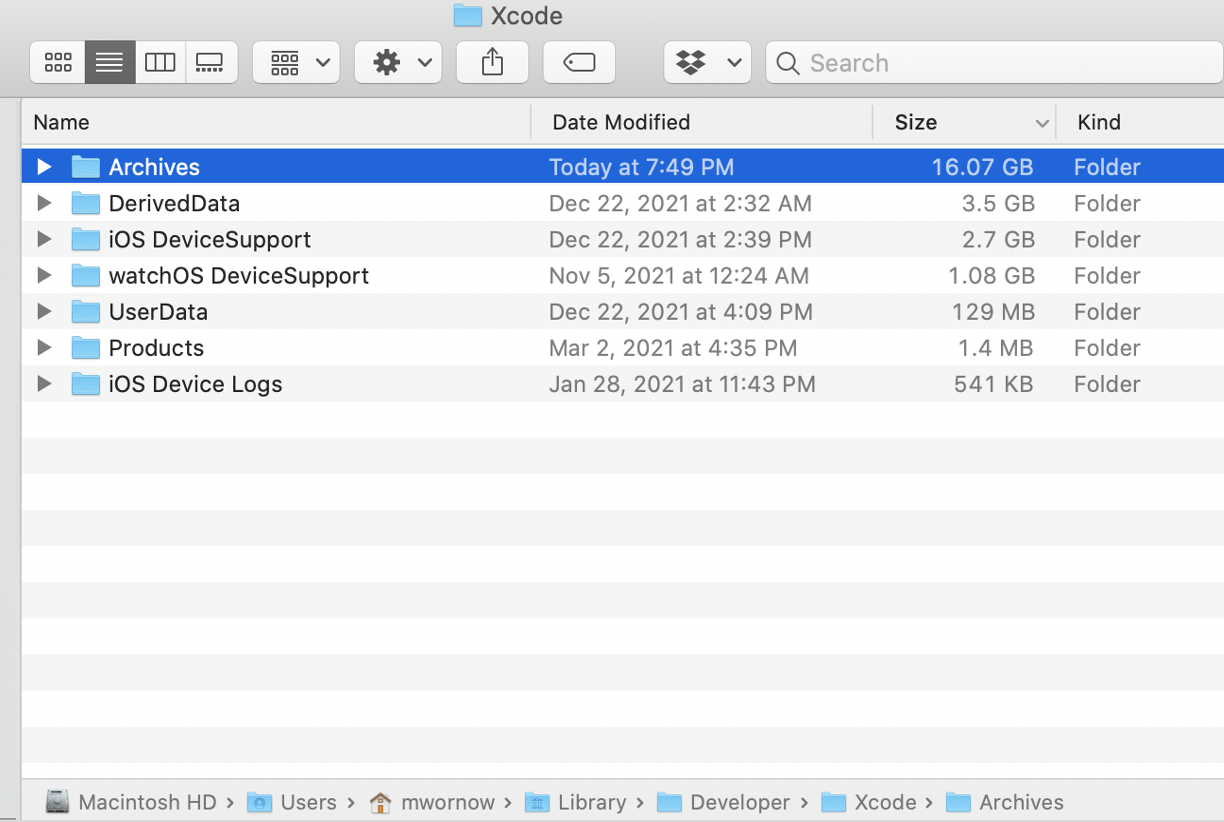
Savings: 15 GB
3b. Derived Data
Everything in ~/Library/Developer/Xcode/DerivedData/ can be safely deleted, as Xcode will recreate these files as necessary.
This folder contains files that XCode creates while building your apps, e.g. indexes, logs, etc.
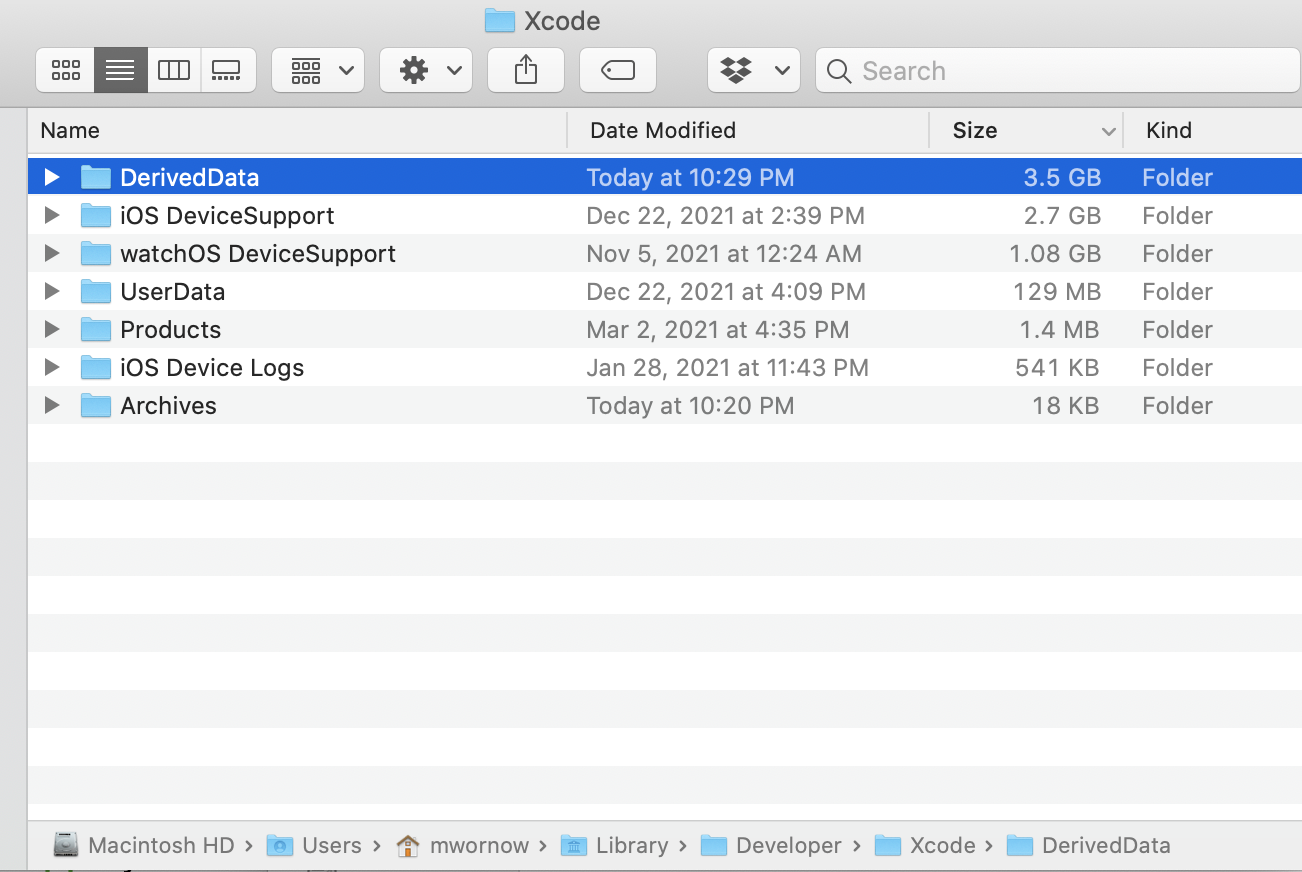
Savings: 3.5 GB
3c. Caches
Everything in ~/Library/Developer/CoreSimulator/Caches/ can be safely deleted, as Xcode will recreate these files as necessary.
These files help XCode run a bit faster when you use it.
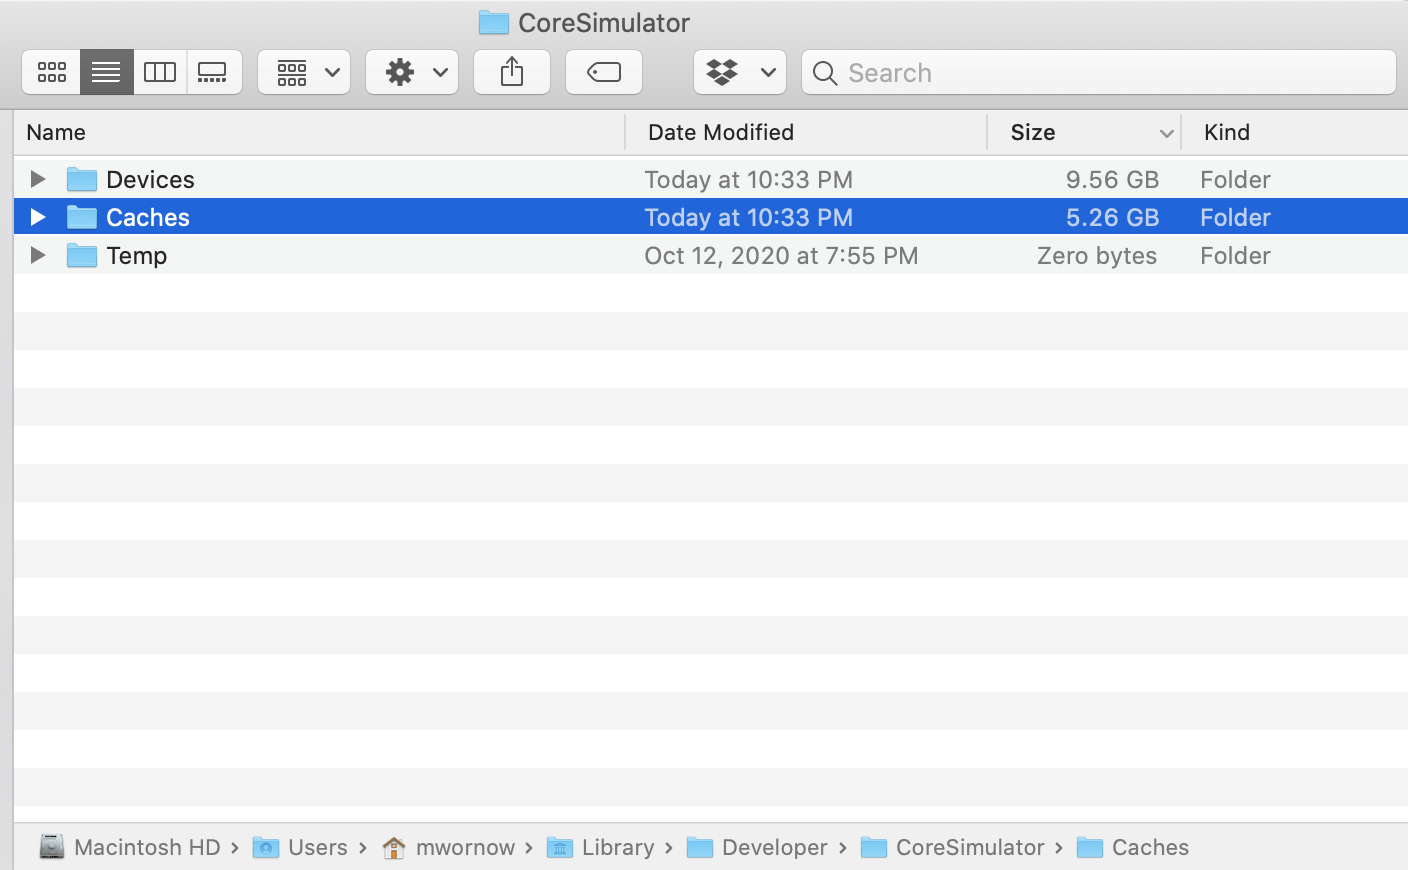
Savings: 5 GB
3d. Devices
Many of the files in ~/Library/Developer/CoreSimulator/Devices can be removed.
Run xcrun simctl delete unavailable to clear out files for unneeded simulator devices.
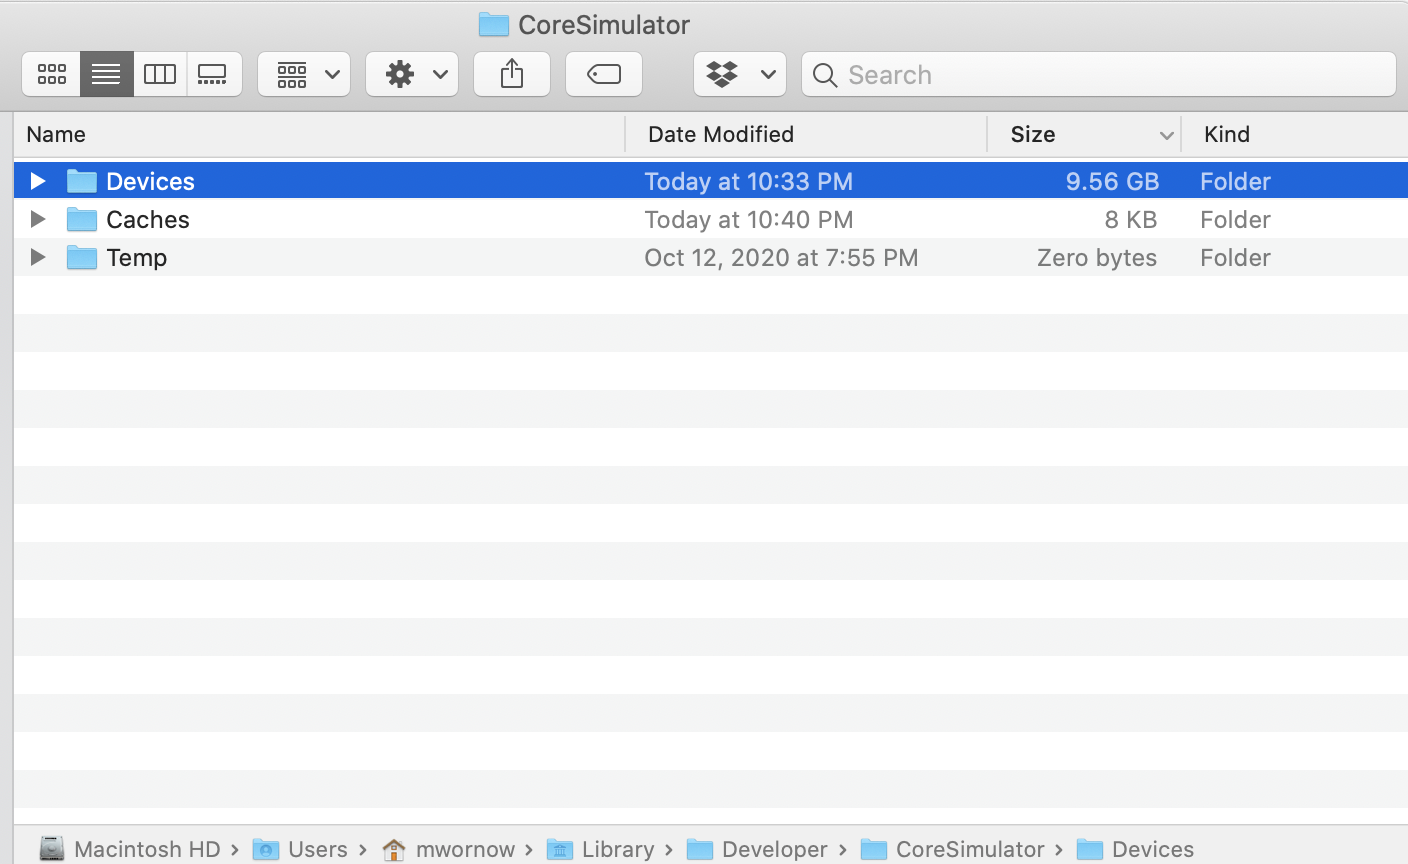
Savings: 7 GB
3e. Summary
Thus, by simply removing unnecessary XCode files, we’ve saved a total of 30.5 GB of memory.
4. Clear Caches
There are also plenty of opportunities to delete files in ~/Library/Caches/.
All of these files should be safe to delete as they are simply caches. However, deleting a cache file may slow down its corresponding application, so I tried to be a bit more selective here.
The folders I chose to delete included:
~/Library/Caches/pip/(3 GB)~/Library/Caches/Yarn/(3 GB)~/Library/Caches/Homebrew/(1 GB)~/Library/Caches/CocoaPods/(0.5 GB)~/Library/Unity/cache/(1 GB)~Library/Application\ Support/Google/Chrome/Default/Service\ Worker/CacheStorage(5.5 GB)
Savings: 14 GB
5. Clear Logs
I also cleared out system logs stored in ~/Library/Logs/.
Savings: 1 GB
6. Remove Anaconda
I realized I had a ton of conda packages installed even though I almost never use conda environments anymore.
So, I deleted ~/opt/anaconda3.
Savings: 6 GB
Summary
So there you have it, roughly 50 GB of extra space without having to delete a single file I cared about!
The breakdown of savings was as follows:
- XCode (
~/Library/Developer): 30.5 GB - Caches (
~/Library/Caches): 7.5 GB - Anaconda (
~/opt/anaconda3): 6 GB - Google Chrome Cache (
~Library/Application\ Support/Google/Chrome/Default/Service\ Worker/CacheStorage): 5.5 GB - Unity Cache (
~/Library/Unity/cache/): 1 GB - System Logs (
~/Library/Logs): 1 GB